
A couple of years ago Petrosys PRO introduced the ability to use a dbm file with WMS layers as a location map. Not only that but location maps can also be included within the map template and displayed in your map by selecting the relevant style template at any time.
There are a couple of ways to display a WMS layer as part of your Location Map:
- As a layer within a dbm file.
- As part of a ‘Location map template’.
Truth be told, both options are very similar. The main difference is that a ‘Location map template’ represents a dbm file saved in a particular location: a folder within the Petrosys local directory called ‘location_basemap_templates’
Note: for more info on how to set and the importance of local directories, check the Petrosys Help, accessed via the software, the topic called ‘PS_LOCAL CONFIGURATION DIRECTORY’.
So, how do we create a dbm with a WMS layer that we can use as a location map?
First, we need to consider if we would like to have additional info besides the WMS layer in this dbm file, i.e., a shapefile. In our experience, it’s better to keep things simple. And considering a web map service points to a raster image with lots of features, most of the time a dbm file with a single WMS layer will do the trick. But there may be cases when additional features need to be highlighted by other spatial datasets, hence the flexibility of this tool allows you to use more than one layer.
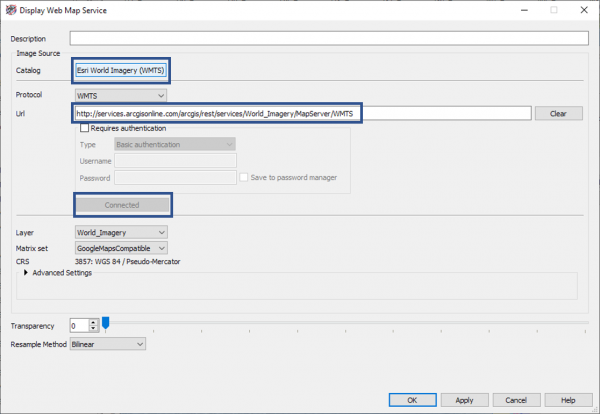
Once we have settled on the number of layers, we then proceed to display the WMS data in a Mapping window as normal. To display WMS data, go to Display\Web Map Service… and connect to the relevant service by entering the relevant Url or, if previously defined, choose one of the options within the Catalog.
Proceed to connect to the service, choose the relevant layer, and display it on your map.
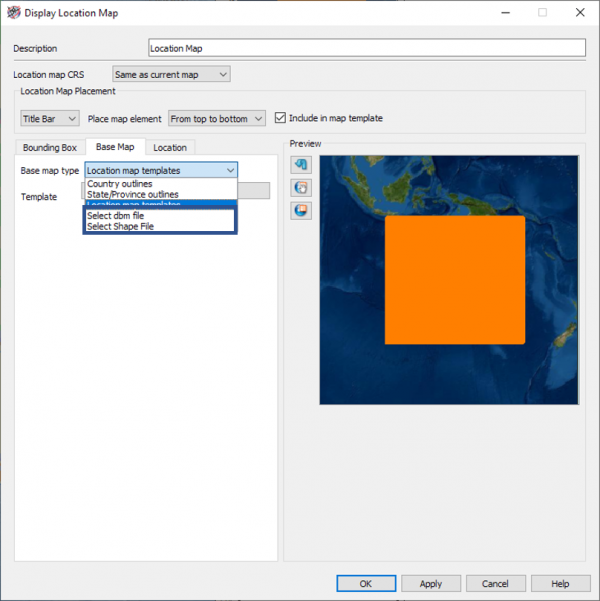
If we are using only a WMS layer, then it is important to set the extent using an Extent Template or the tools available within Map Template. This is important as, contrary to other types of data, WMS data will not allow you to set the extent using the dynamic mode.
Tip: don’t worry about the style as this will not have an impact on the location map.
Once the relevant data and extent are set, you are ready to save the map as a dbm file. As mentioned above, if you decide to save this dbm file within the Petrosys local directory, you’ll be able to select it as part of your ‘Location map templates’. The advantage of doing it this way are:
- No matter the project you are working with, it will always be available to you.
- And if the local directory has been set in your site as a ‘shared’ one, every user will have the option to choose the same location map.
Now that the dbm file has been saved in the local directory, this location map template should be part of the list of templates available, as seen in the below screenshot.
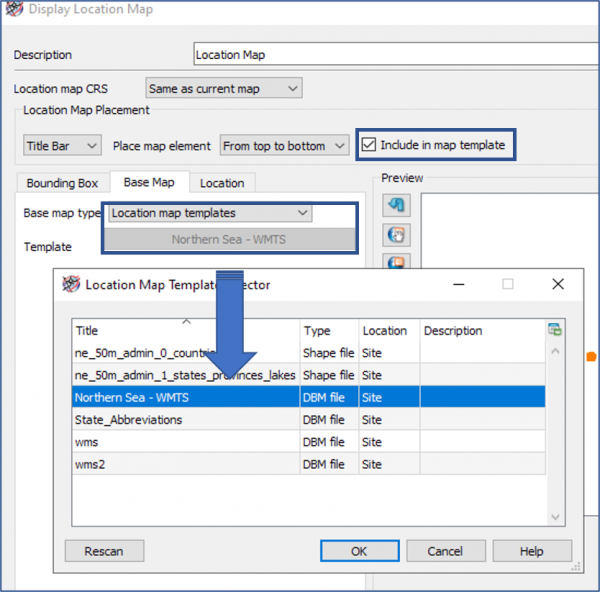
Furthermore, if the location map is being made part of the template, as a user you’ll only have to select the relevant style template to display it. This is accomplished by enabling the ‘Include in map template’ box.
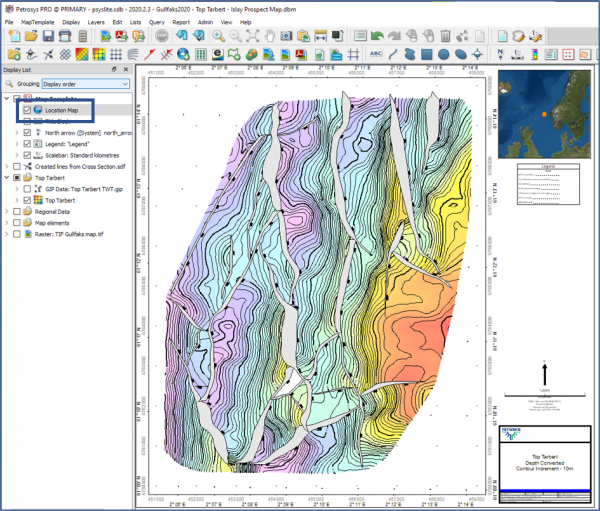
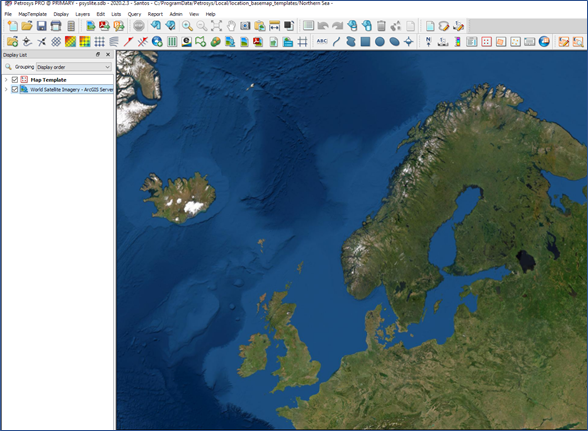
An example of how a location map would look like can be seen below in this map where a location map with WMS data has been included as part of the style template.