

With the release of the new Petrosys PRO 2018.2, users can now edit grids and faults directly from Petrel and OpenWorks. This means the full suite of tools in the Spatial Editor is now available to edit grids from these two applications, without the need for importing and exporting to and from Petrosys PRO’s native formats.
Combine this new feature with recent developments, like “Drag&Drop” from Petrel and DecisionSpace, the workflows to edit and re-grid data from these sources have been substantially streamlined.
As an example of how these new features would benefit users and help them to save time, consider the scenario where you want to improve the definition of a fault while also changing the geometry of a Petrel grid.
As an initial step, you will need to connect Petrosys PRO to your Petrel project. To do this, launch Petrosys PRO from within Petrel by selecting the Petrosys PRO tab and then clicking on the icon.
![]()
If you have not configured a Petrosys PRO project for a particular Petrel or DecisionSpace project, a prompt like the one below will be displayed when launching the plugin.
Select ‘Yes’, to automatically create a Petrosys PRO project. The name of the project will be taken from the Petrel project, along with the CRS details. More info on this feature can be found here.

Once a Petrosys project has been created/selected, open a Mapping window and display the Petrel grid to be edited. The easiest way of doing this is by using ‘Drag & Drop’ directly from the Petrel Input pane into the mapping area or the Display List in the Mapping window.
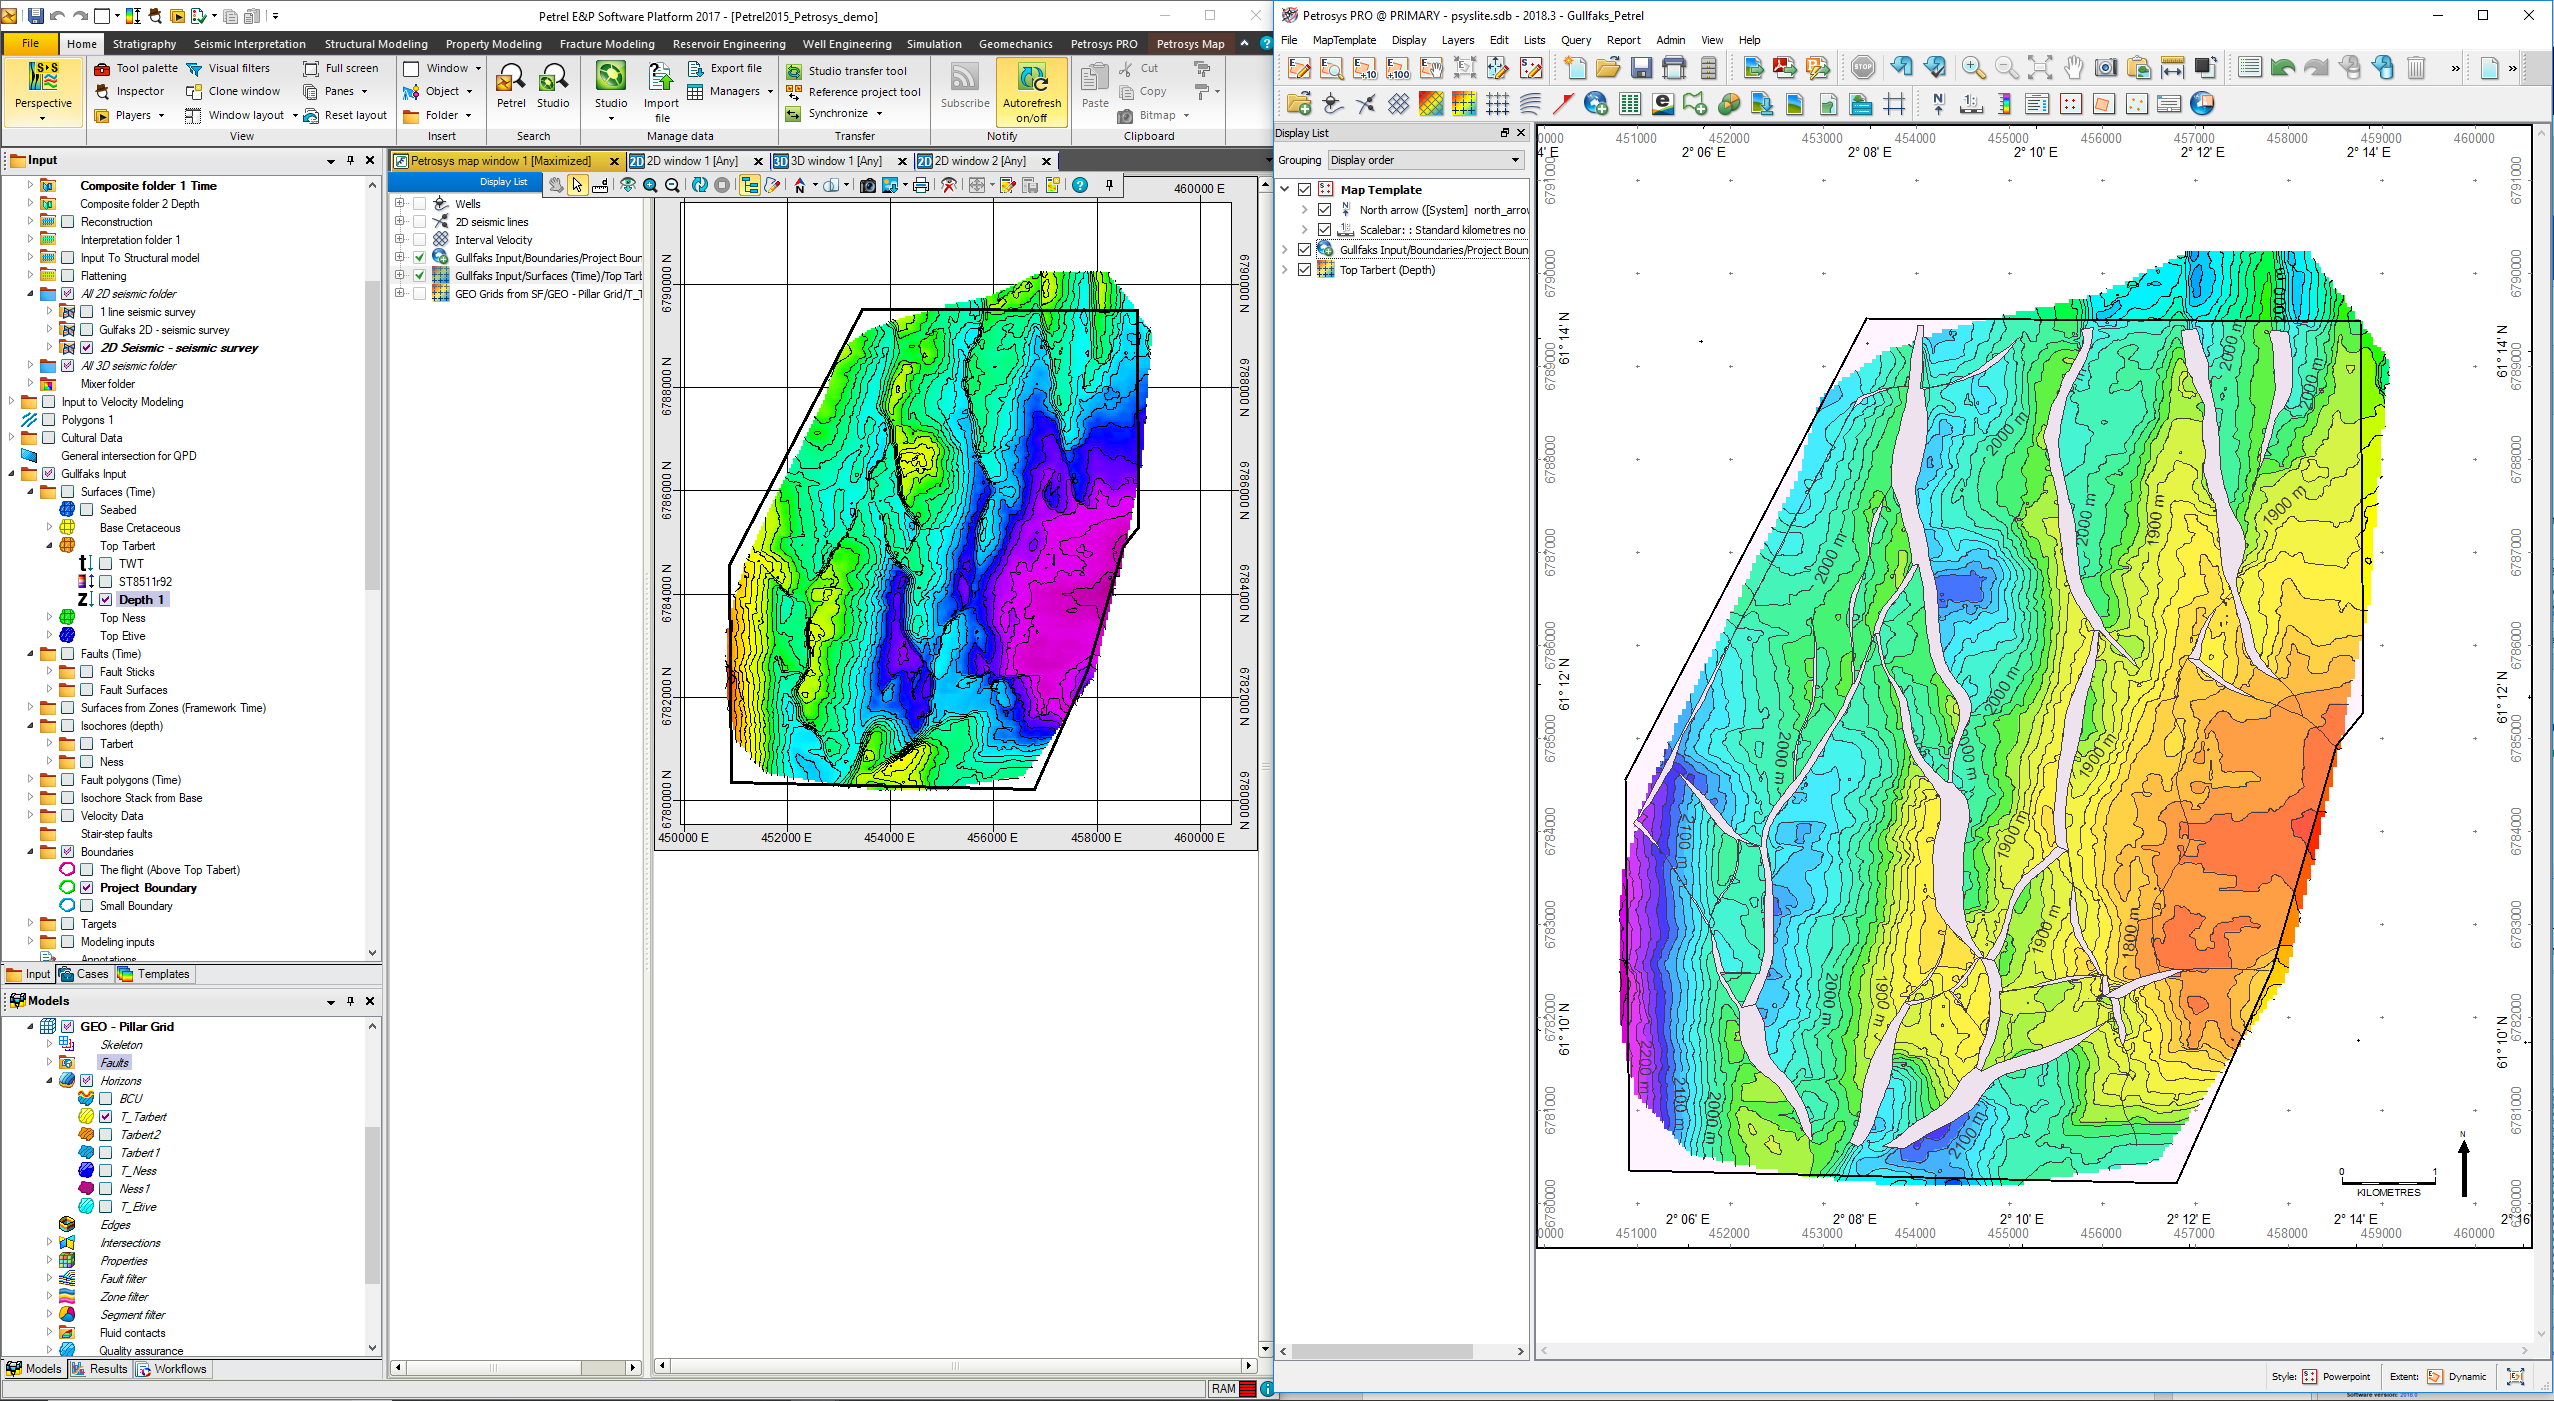
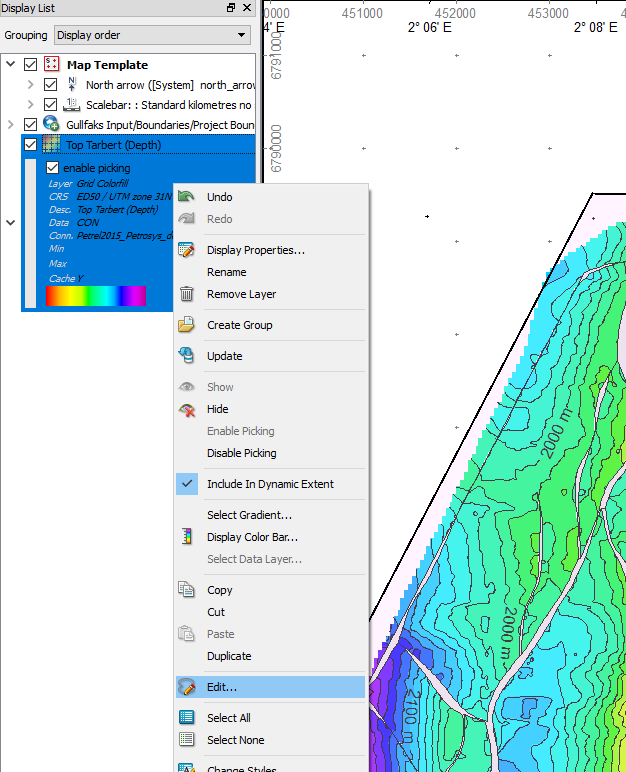
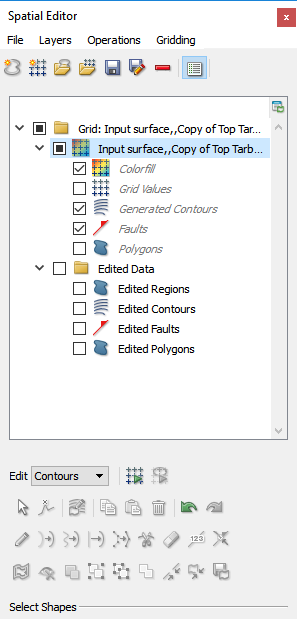
Now you are displaying the grid in Petrosys directly from your Petrel project. To start editing, select the grid in the Display List or in the mapping area, right-click it and select Edit… Alternatively, open the Spatial Editor from the Edit menu and then drag the grid from the Display List into the Editor.
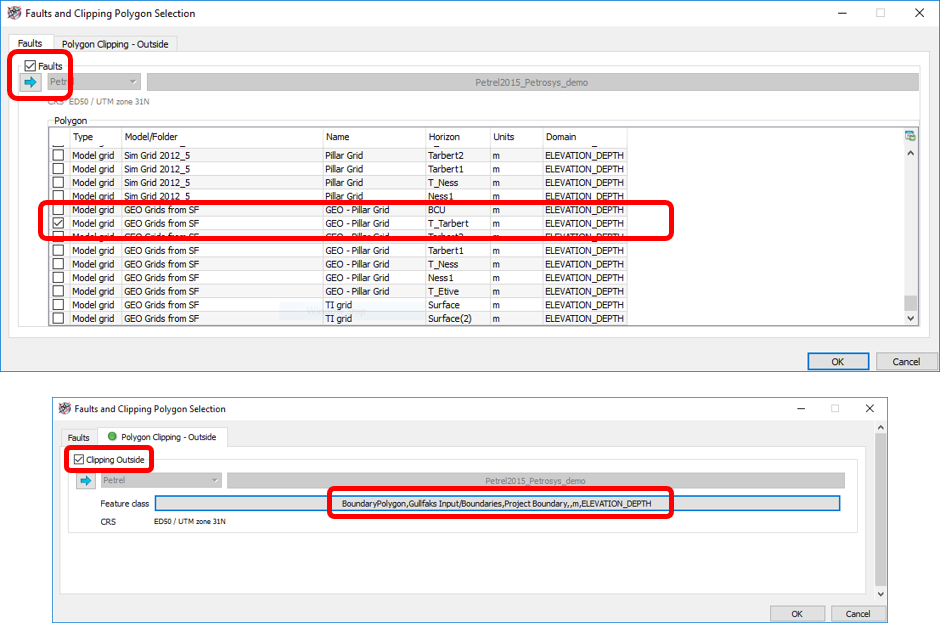
You will now be prompted to select faults and clipping polygons from your Petrel project. Note, as in any other panel when you need to select Petrel data, there are multiple ways of doing this: 1) by selecting directly from the list, 2) by ‘drag&drop’ from Petrel into the relevant box, and 3) by selecting the data in the Petrel Input panel and then clicking in the relevant ‘blue arrow’.
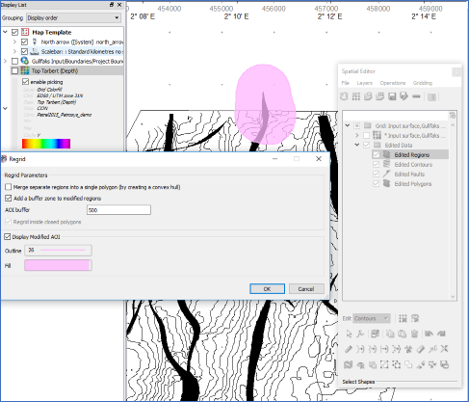
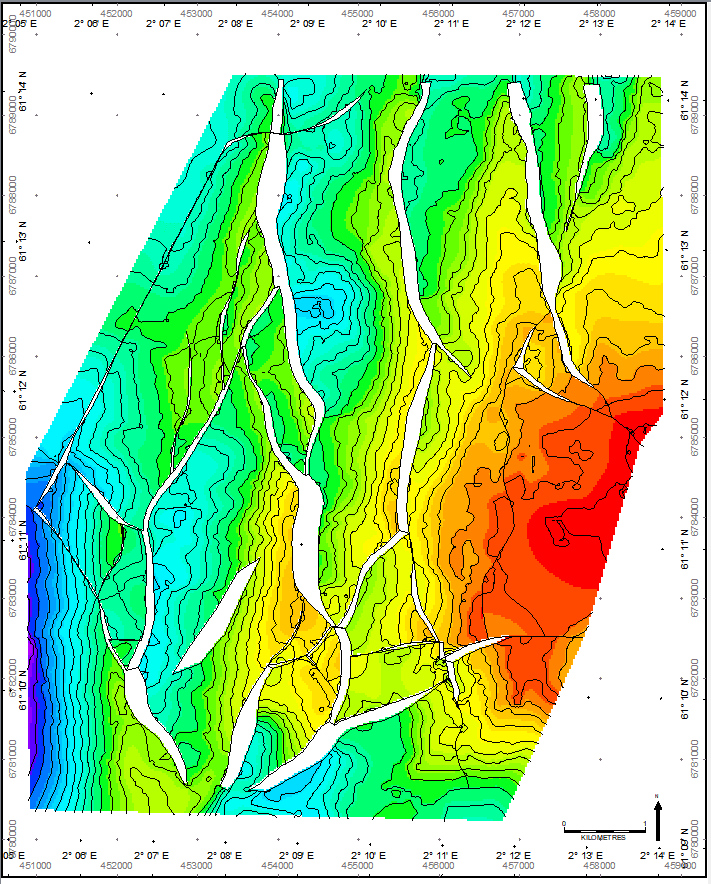
Now proceed to edit the grid either in ‘Grid’ or ‘Contours’ mode. Below shows ‘Contours’ mode to improve the definition of a fault polygon using one of the many editing tools available in the Spatial Editor.

Once you are satisfied with these edits, select the regridding option that best applies to your changes. In this case, some local changes have been made, so ‘Localised regrid’ has been performed, with a buffer of 500 metres around the edits that have been made.
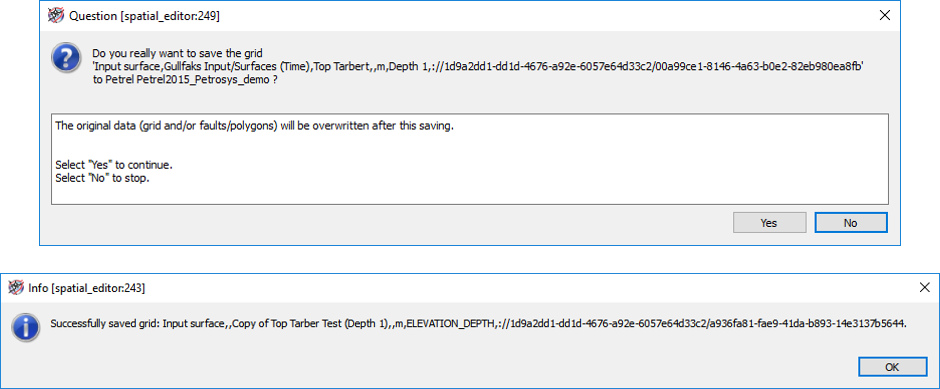
 To finalize the process, visualize the generated grid and save it in the Spatial Editor. A prompt will ask you if you wish to overwrite the data. Once you click ‘Yes’, another prompt will let you know the grid was saved successfully.
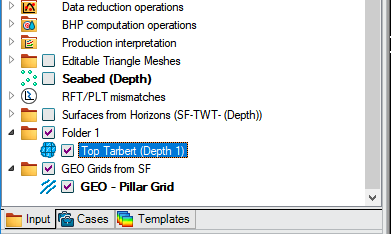
Back in the Petrel project, if you were dealing with fault data, as in this example, you will now have two new folders in your Input pane: one with the grid data that was overwritten and another for the edited fault polygons. These datasets now contain the edits that you did in Petrosys that were pushed back into the Petrel project as soon as you saved them in the Spatial Editor.
The above workflow can be similarly applied to data directly sourced from OpenWorks.
More info and workflows on how to work with the Spatial Editor can be found in the Learn section of the Client Portal.
You can also contact your local Petrosys office directly or by sending your queries to Support@petrosys.com.au.