

Identify the Source Signature
Typically, Marine raw seismic data would best be described as mixed phase, being neither Minimum or Zero Phase phase. Ideally, your data will come with a recorded or modeled farfield source signature, for modern acquisition it will likely be modeled by a package like Gundalf or Nucleus while vintage data may use a farfield hydrophone to record the signature.
However, signatures are often mislaid when seismic surveys are archived, if you are unable to locate the signature you can use a stacked autocorrelation as an approximation of the farfield signature.
Minimum or Zero Phase?
Firstly you should decide if you are converting to Minimum or Zero phase, some things to consider when making this decision are:
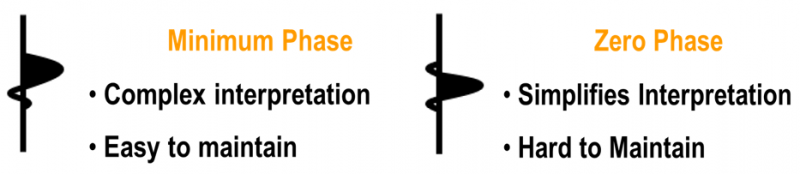
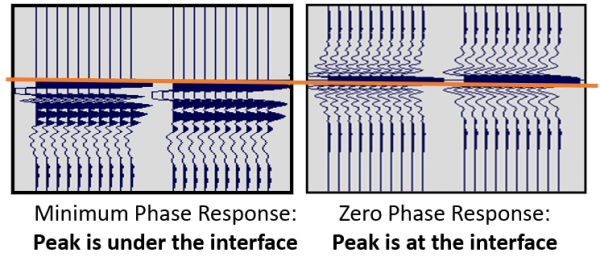
With modern controlled phase processing sequences converting to zero phase at this early stage of processing can be an option providing your processing flow is phase preserving i.e no short gap decons or similar processes that affect the phase of the data.
The methodology for creating a Zero or minimum phase conversion filter is the same, but for the purposes of this example, we will concentrate on creating the Minimum phase conversion filter.
Importing farfield Signatures into WAVELET
We need to import the supplied farfield signature into Claritas which are typically supplied as ASCII text or SegY files. ASCII formats from Nucleus or Gundalf source modeling packages can be input directly to the Claritas WAVELET application.
Other ASCII formats would need to be manipulated into something matching these or Claritas Wavelet format and readable by the Claritas xascsegy utility which can read ASCII single column text formats and create a SegY dataset. The sample rate of modeled signatures tends to be higher resolution than the acquired seismic data so you will need to resample the signature as part of the processing flow in WAVELET.
The WAVELET application can be launched from the Wavelet tab of the Claritas launcher. The initial Parameter form will prompt you for an input wavelet/farfield signature file or a WSP (Wavelet Session Parameter) file.
It is recommended that you define a WSP file as it will allow you to re-start a Wavelet session and open or recreate any intermediate stages/processes applied.
Import the farfield signature by clicking on the new button, which opens the parameter form below:
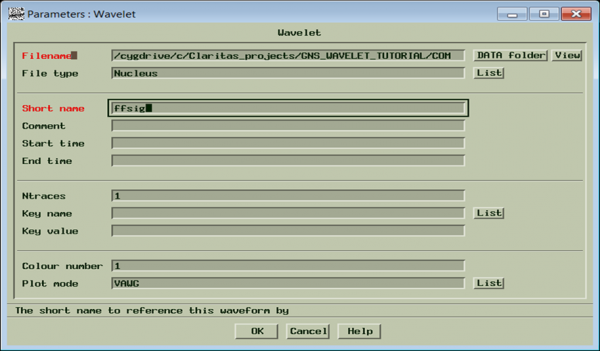
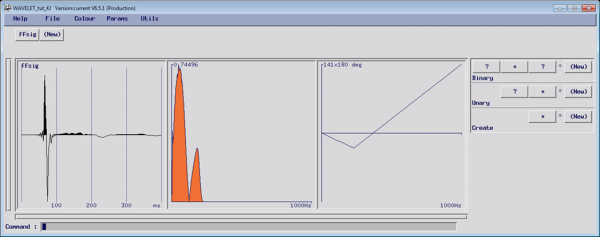
Define the input filename, the format of the file, and define a short name for use in the application. Once you click Ok the farfield signature is loaded and displayed in the application, displaying the wavelet, amplitude spectra, and phase spectra’s as shown below :
Processing the dataset
Now that the signature is in the WAVELET application you can start to process the dataset, build in the receiver ghost, and possibly de-bubbling operator as required, both of which can be generated in the WAVELET application.
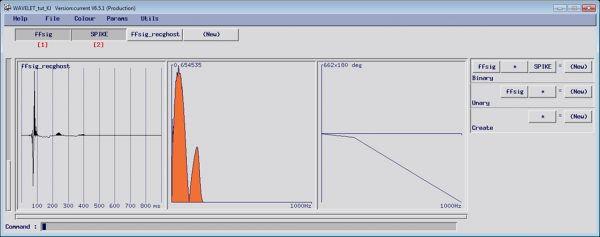
Receiver ghost can be produced using the Create menu producing a negative amplitude spike at the time period of the Receiver ghost. You can then convolve this with the input signature, the resulting signature with ghost displayed below:
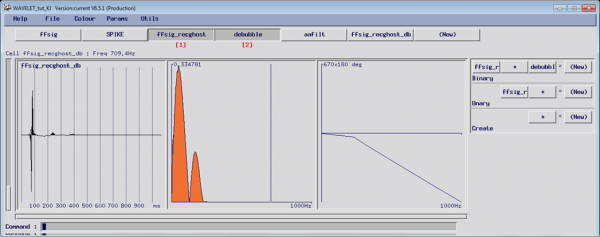
The de-bubble (deconvolution operator) using the Decon option from the Unary filter is then convolved with the farfield signature, shown below :
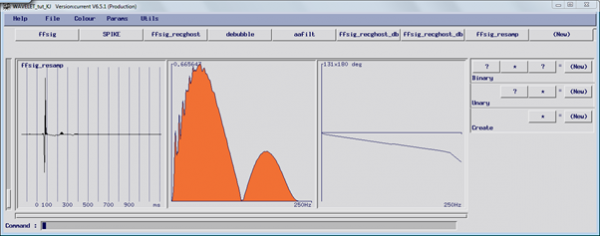
Resampling the Wavelet
This is the ideal point to resample the wavelet so it matches the sample rate of the seismic data we will be applying the conversion filter to. We can
- create an anti-alias filter within the application using the Unary menu and selecting the Butterworth filter option.
- define an aa-filter for the desired 2ms sample rate (the desample operator itself does have in-built aa-filters you can use if preferred).
- from the Unary option select the Resample option and define the desired sample rate.
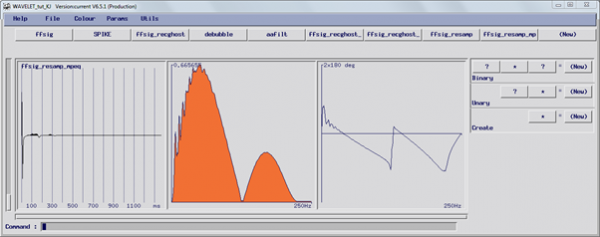
Generating the minimum phase
Now the Signature has been pre-processed as required we can generate the minimum phase equivalent of the input signature.
Select the Minphase operator from the Unary menu, this creates a wavelet that is the Minimum phase equivalent of the resampled Farfield signature. Below is the input signature 2ms and the minimum phase equivalent:
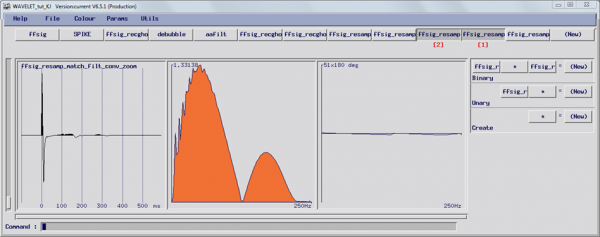
Creating a matching filter
Now we have the minimum phase equivalent and the signature we can input these wavelets to create a matching filter using the binary MatchFilt option. We then convolve the matching filter with the signature and confirm that the resulting output is Minimum phase as shown :
Exporting the results
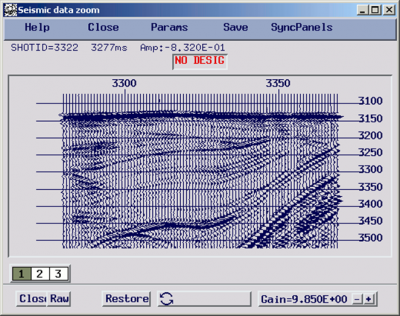
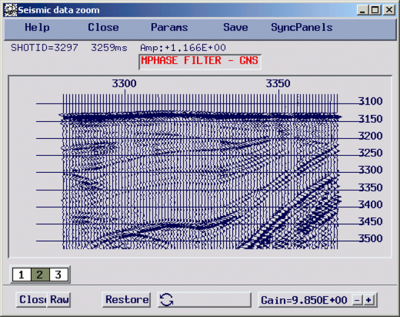
If we are happy with the results the matching filter can be exported as an ASCII text file in Claritas wavelet format (.wts). This can then be used by the CONVCORR module to convert the acquired seismic data to minimum phase as shown below:
A tutorial project and PowerPoint detailing the workflow is available from the Petrosys client portal. If you want to practice applying the workflow to a data example, and there is also a video on the Claritas youtube showing a run through of the workflow in this tutorial as an additional resource for our users – The GLOBEClaritas Wavelet Application.
If you have more questions on this article or would like to suggest a topic for our next ‘Ask Andy’ please get in touch below.
GLOBEClaritas Enquiries
If you would like to know more or have questions please use the form to get in touch with one of our experts.