
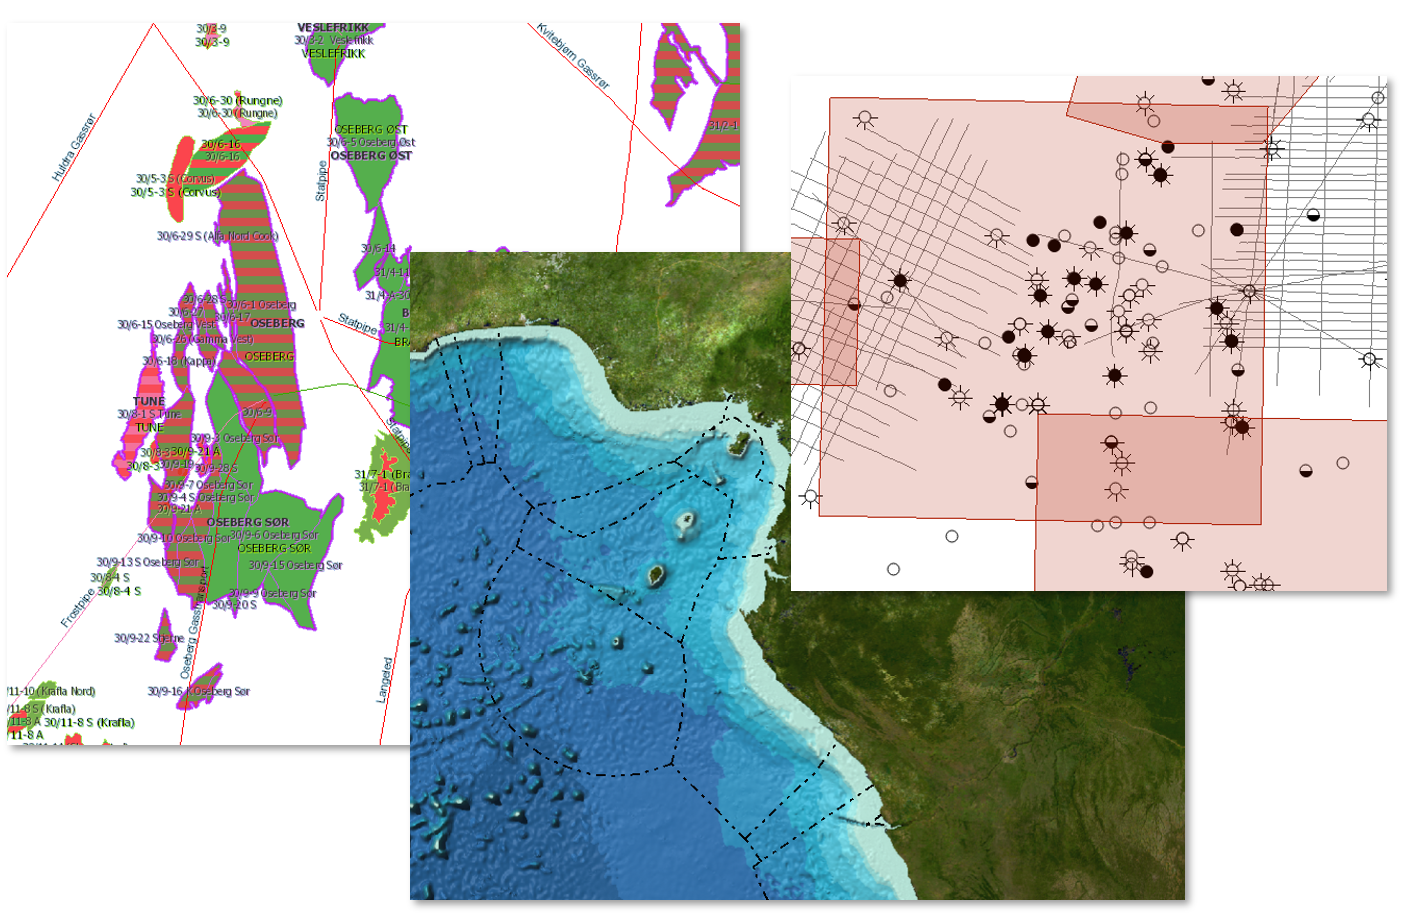
A Petrosys PRO basemap provides the map user with context to more detailed information and is typically displayed as a layer beneath other data. Data types are often from imagery or GIS, but geoscience specific basemaps, such as seismic coverage; basin interpretation of a key horizon; or corporate-approved well tops, are some other examples.
Petrosys PRO 2018 introduced “basemap templates” with the aim of giving users quick access to company standard symbology and datasets. For company implementations, basemap templates created by an expert user can then be applied by all PRO users on all projects. Similarly, for an individual Petrosys PRO user, they too can apply the same basemap templates across all of their projects.
So, how do you set them up?
- Create a new Petrosys PRO project which must be called base_map_templates. This must be in your Petrosys PRO site configuration folder, the local
- In this new project create as many basemaps as you want. Each basemap is just a Petrosys PRO dbm file and can have different layers and use folder groups.
- Your basemap dbms can be in different coordinate reference systems.
The most important point to consider is where the source data is located. File-based data can be stored within the project, or externally and read through the file path. Web-based and database data will be read directly from source.
For the end user:
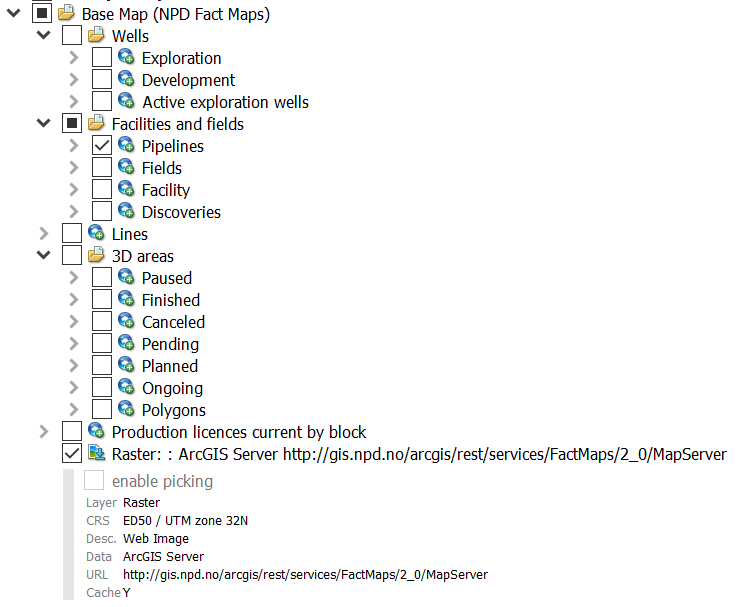
- Click on the BaseMap button on the bottom-right of the mapping panel and choose a basemap from the list. You can choose more than one basemap for display.

- Switch layers on and off, re-order them as required. You can also switch on/off annotation, do overpost correction etc. But please think carefully before changing the symbology itself!
For help setting up, or using basemap templates, please contact Petrosys Support.